Save Small JPEG
Save Small JPEG is simple and quick to use Adobe Photoshop script for preset based exporting of small images indvidually or as batch of images from a folder. It should work on Mac or Windows.
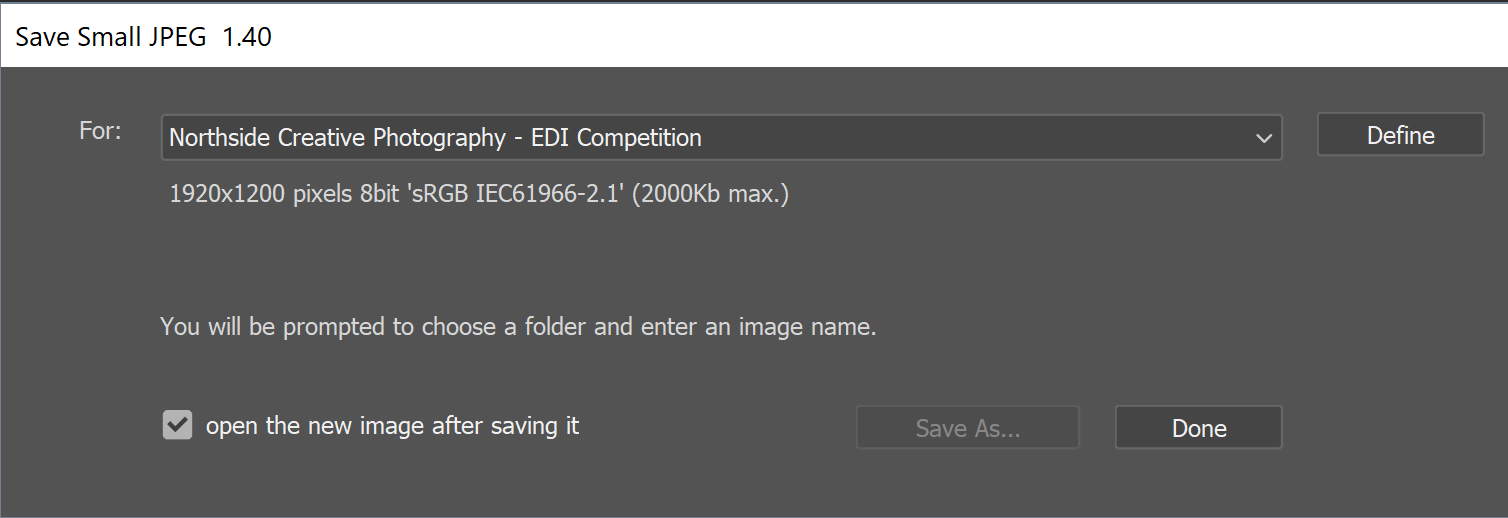
For example to export a single image with the provided preset:
- open the image in Photoshop
- run the script
- click the “SaveAs…” button.
The script can be used to rotate, add borders and run photoshop actions for each image processed making it useful for exporting images for books, web or supermarket printers.
Screenshots
The main window:

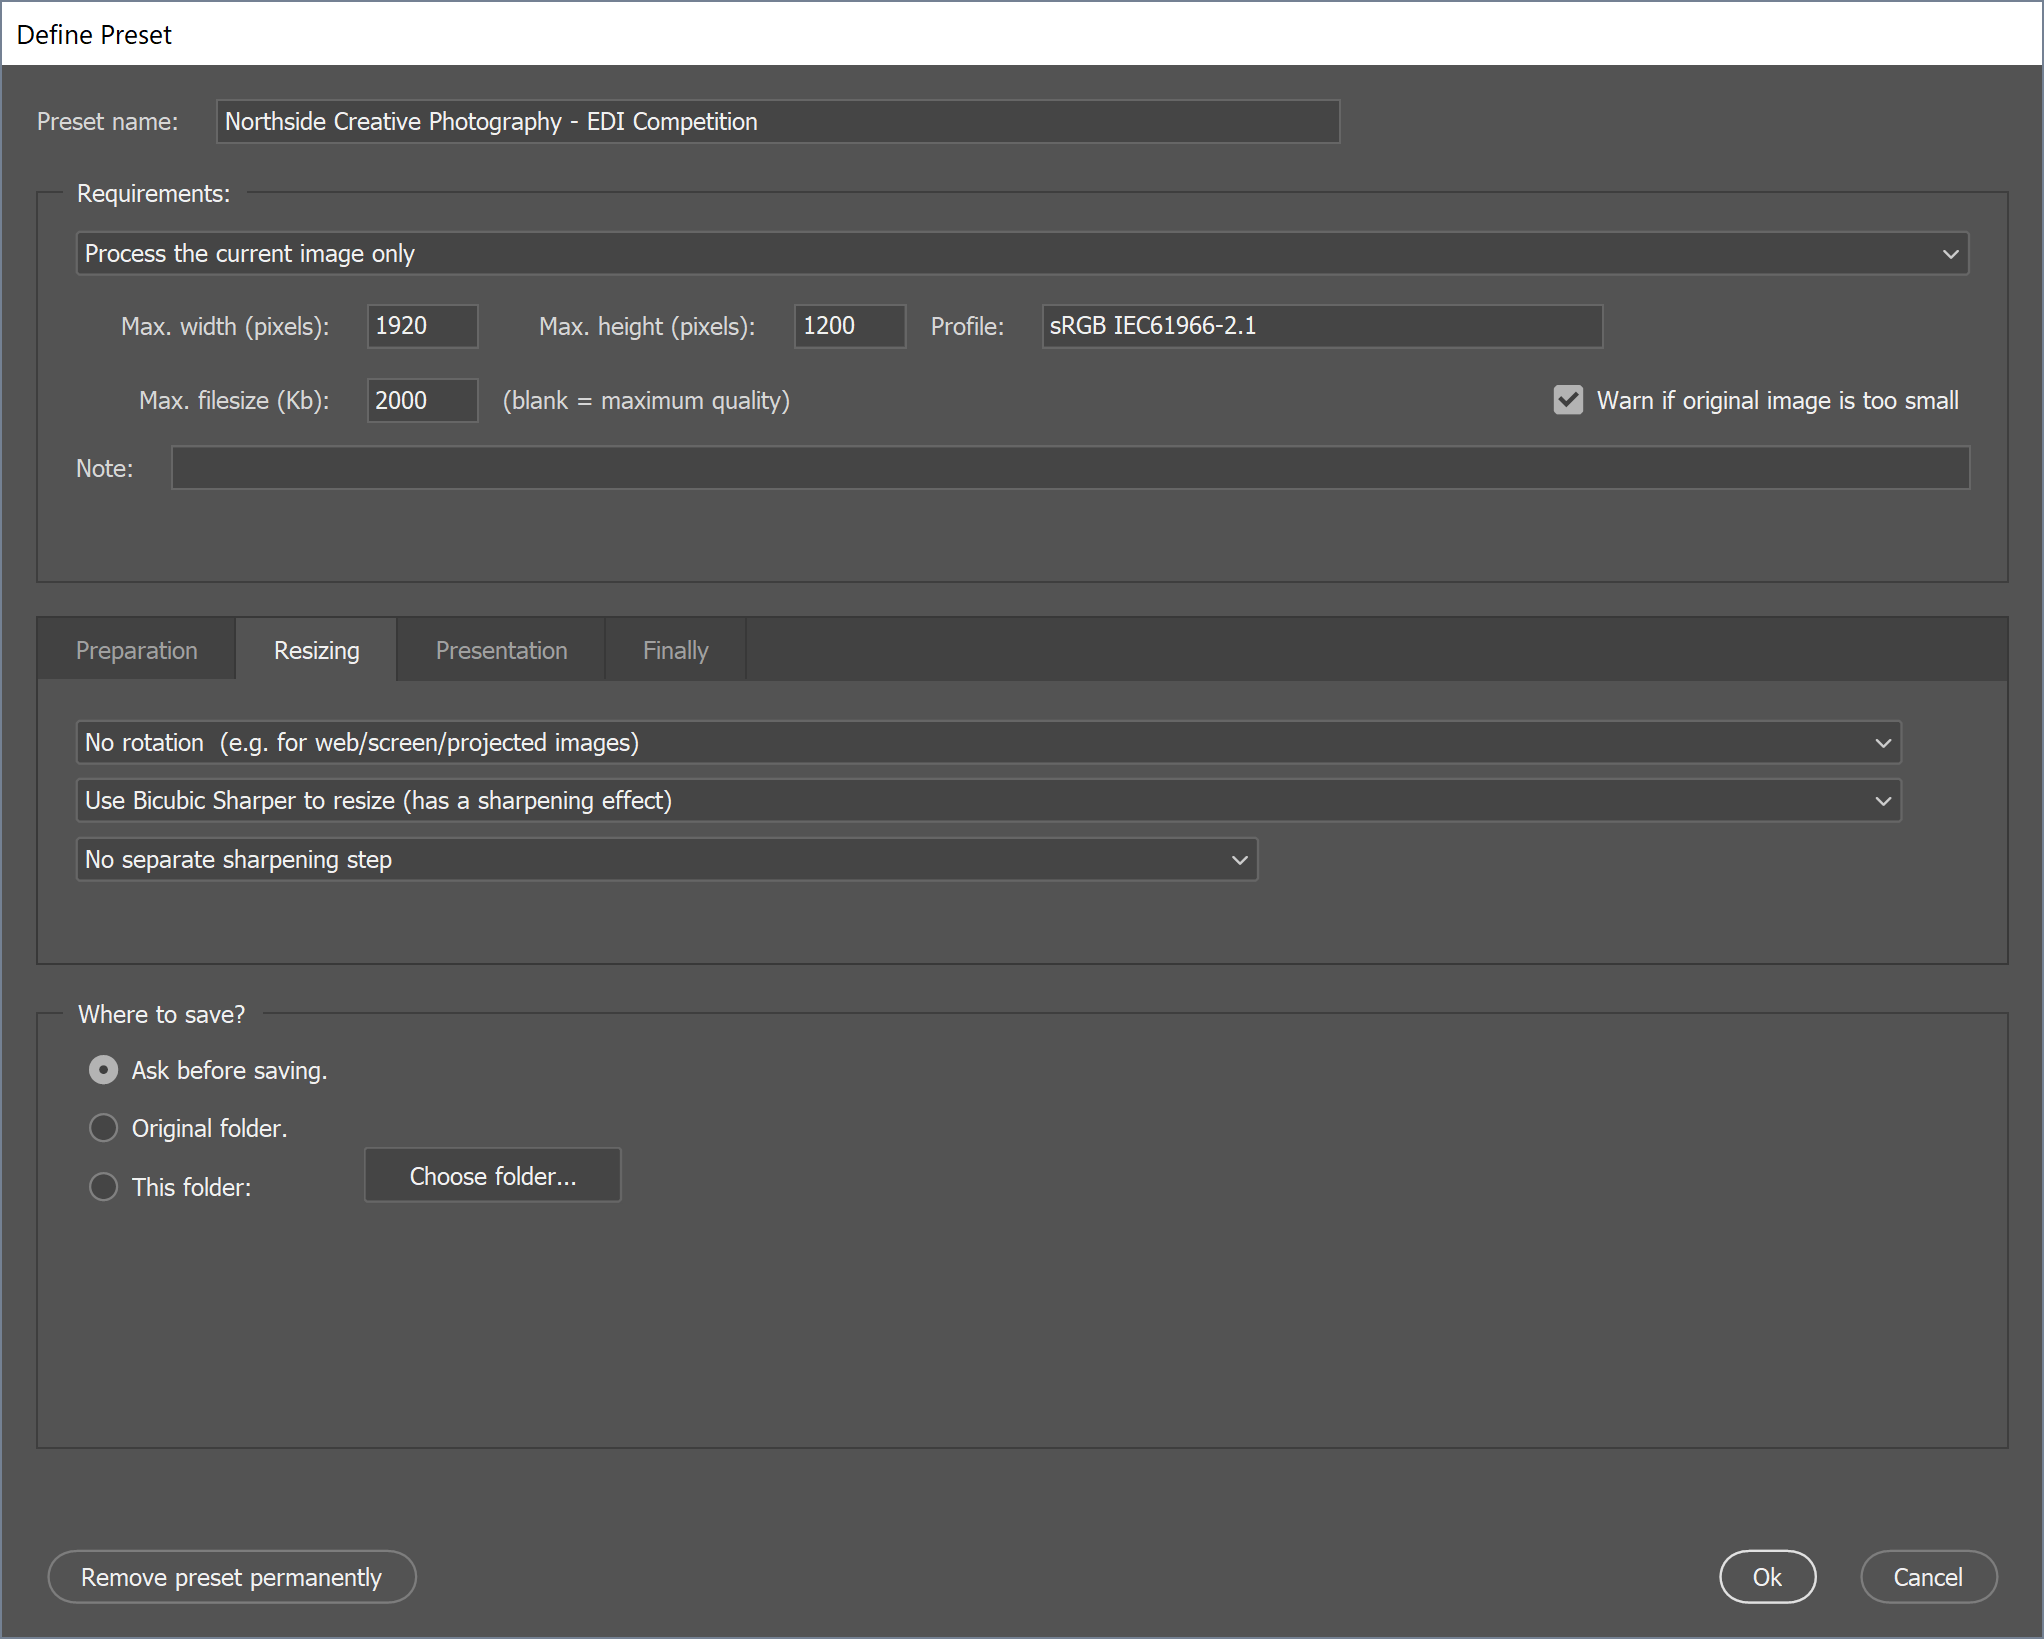
The preset settings window:

Features
- All work carried out on a duplicate of your image.
- Export settings are stored as a named preset.
- Define multiple presets.
- Constrain images to fit within width and height.
- Exports as sRGB.
- Optional maximum file size, maximises quality while fitting in specified file size.
- Folder processing mode - for batch processing.
- Process a list of files - for batch processing.
- Optional, subfolder destination templates.
- Optional photoshop actions.
- Optional rotation, scaling and border options.
- Optional Bruce Fraser sharpening for digital display.
- Preset file is a simplified XML file that could be distributed.
- Support for producing Instagram images by adding filler borders.
- Simple user interface.
Where to download
Save the script to a folder on your computer from this link: savesmalljpeg.jsx. Depending on your browser you may need to right-click on the link and use the “Save Target As…” or “Save Link As…” option.
How to run the script
To run without installing it: use File/Scripts/Browse and load the script.
For ongoing convenience: copy the script to your Photoshop …/Presets/Scripts folder, then you can access it by File/Scripts/Save Small JPEG…
Making and removing presets
The first time the script is run it creates a default preset. Any changes you make are saved in a file in your photoshop settings folder when you exit the script.
To create a new preset, first choose an existing preset that’s close to what you want, click “Define” and then enter a new name for it. Make any settings changes for the new preset and click “Ok”.
The default preset is designed to make life easy for members of the camera club I attend, but can be removed. To remove a preset you click the “Remove preset permanently” button. This button is enabled once there are two or more presets defined.
Defining a preset
Click the “Define” button to open the settings for a preset. Make changes as necessary and Click “Ok” to save the changes or click “Cancel” (or hit Esc key) to cancel changes.
The settings here determine what images are procesed (one opened image or many images in a folder), how the images are processed, where the images are saved to and how they are named.
The tabs “Preparation”, “Resizing”, “Presentation” and “Finally” provide options for each of the processing steps of an image.
Batch processing by Folder
Folder processing of images in a batch can be activated by changing “Process the current image only” to “Process all images in a folder”. The operation of the main dialog changes for this option.
On the main dialog, a “Browse” button becomes available to choose the folder of images to process. The “Run” button starts the batch process.
Batch processing by list of images
This is a useful option when your images are spread across different folders, or where you want to reprocess a list of images in different sizes.
Use the “Process a list of images” option in the preset.
On the main dialog, a “Browse” button becomes available to choose the text file of images to process. The “Run” button starts the batch process.
The text file format is simply a full file path to each image on a separate line for example:
C:\Users\brett\Pictures\Image1.PSD
C:\Users\brett\Pictures\Image2.TIF
C:\Users\brett\Pictures\Image3.JPG
Photoshop upgrades and versions
If you upgrade Photoshop you may find that your settings of the script are not avaiable in the new version. Photoshop stores settings per version so if you want you can manually copy the the script’s settings file to the new version of photoshop.
At the time of writing for example my script settings file is stored in this location on Windows:
C:\Users\brett\AppData\Roaming\Adobe\Adobe Photoshop 2021\Adobe Photoshop 2021 Settings
The script settings file is called:
SaveSmallJpegSettings.xml
Processing workflow
The script does these steps.
- Duplicate, flatten, optional preparation action.
- Optional rotation, resize image to fit within optional presentation borders, optional sharpening.
- Optional presentation action and flatten.
- Extend canvas, background colour, position image according to presention options.
- Optional final background action.
- Convert to output profile, convert to 8bit.
- Save iteratively until specified filesize achieved while maximising JPEG quality.
License
It’s an MIT license, which can be found in the GitHub repository. Essentially, you are free to use this script on the understanding that you do so at your own risk.